

DIY: FIMO FLY MUSHROOM
Would you like to bring a bit of forest and magic home? Then we have the perfect DIY instructions for you today. With this you can easily make small, cute toadstools out of polymer clay. Which you can use for very different decoration ideas for your home.
Required material
- Soft polymer clay in white
- document
- Plastic bag
- Various modeling tools (forks, knives, sticks, etc.)
- Brush
- Acrylic paint

1. Prepare polymer clay
Before you start kneading, we have a tip for you. First put the polymer clay on the heater for a bit so that you can knead it more easily afterwards. About 10 minutes is sufficient. Then start kneading the polymer clay until it is nice and soft and easy to shape.

2.Form the cap of the mushroom
Form a round ball, then flatten it and shape it into a nice mushroom dome. To do this, you can paint and thin out the sides a little. If you are happy with the shape, you can remove the cap from the base and add the finishing touches in your hand.

3.Score the slats
Now you can finish the cap of the fly agaric by adding the slats with a sharp knife or fork.

4. Shape style
Roll an elongated sausage and then shape the style of the mushroom. Make sure the mushroom can stand on its own.

5. Put on style
Now you combine the style and caps with light pressure.

6. Form cuff
To make the cuff, first form an elongated sausage and then flatten it. Use a fork to score the bottom side so that it frays evenly.

7. Put on the cuff
Now place the cuff on the fly agaric and press it firmly in the upper area of the cuff. Press the frayed ends upwards so that they do not rest directly on the mushroom. This ensures more plasticity.

8. Finish
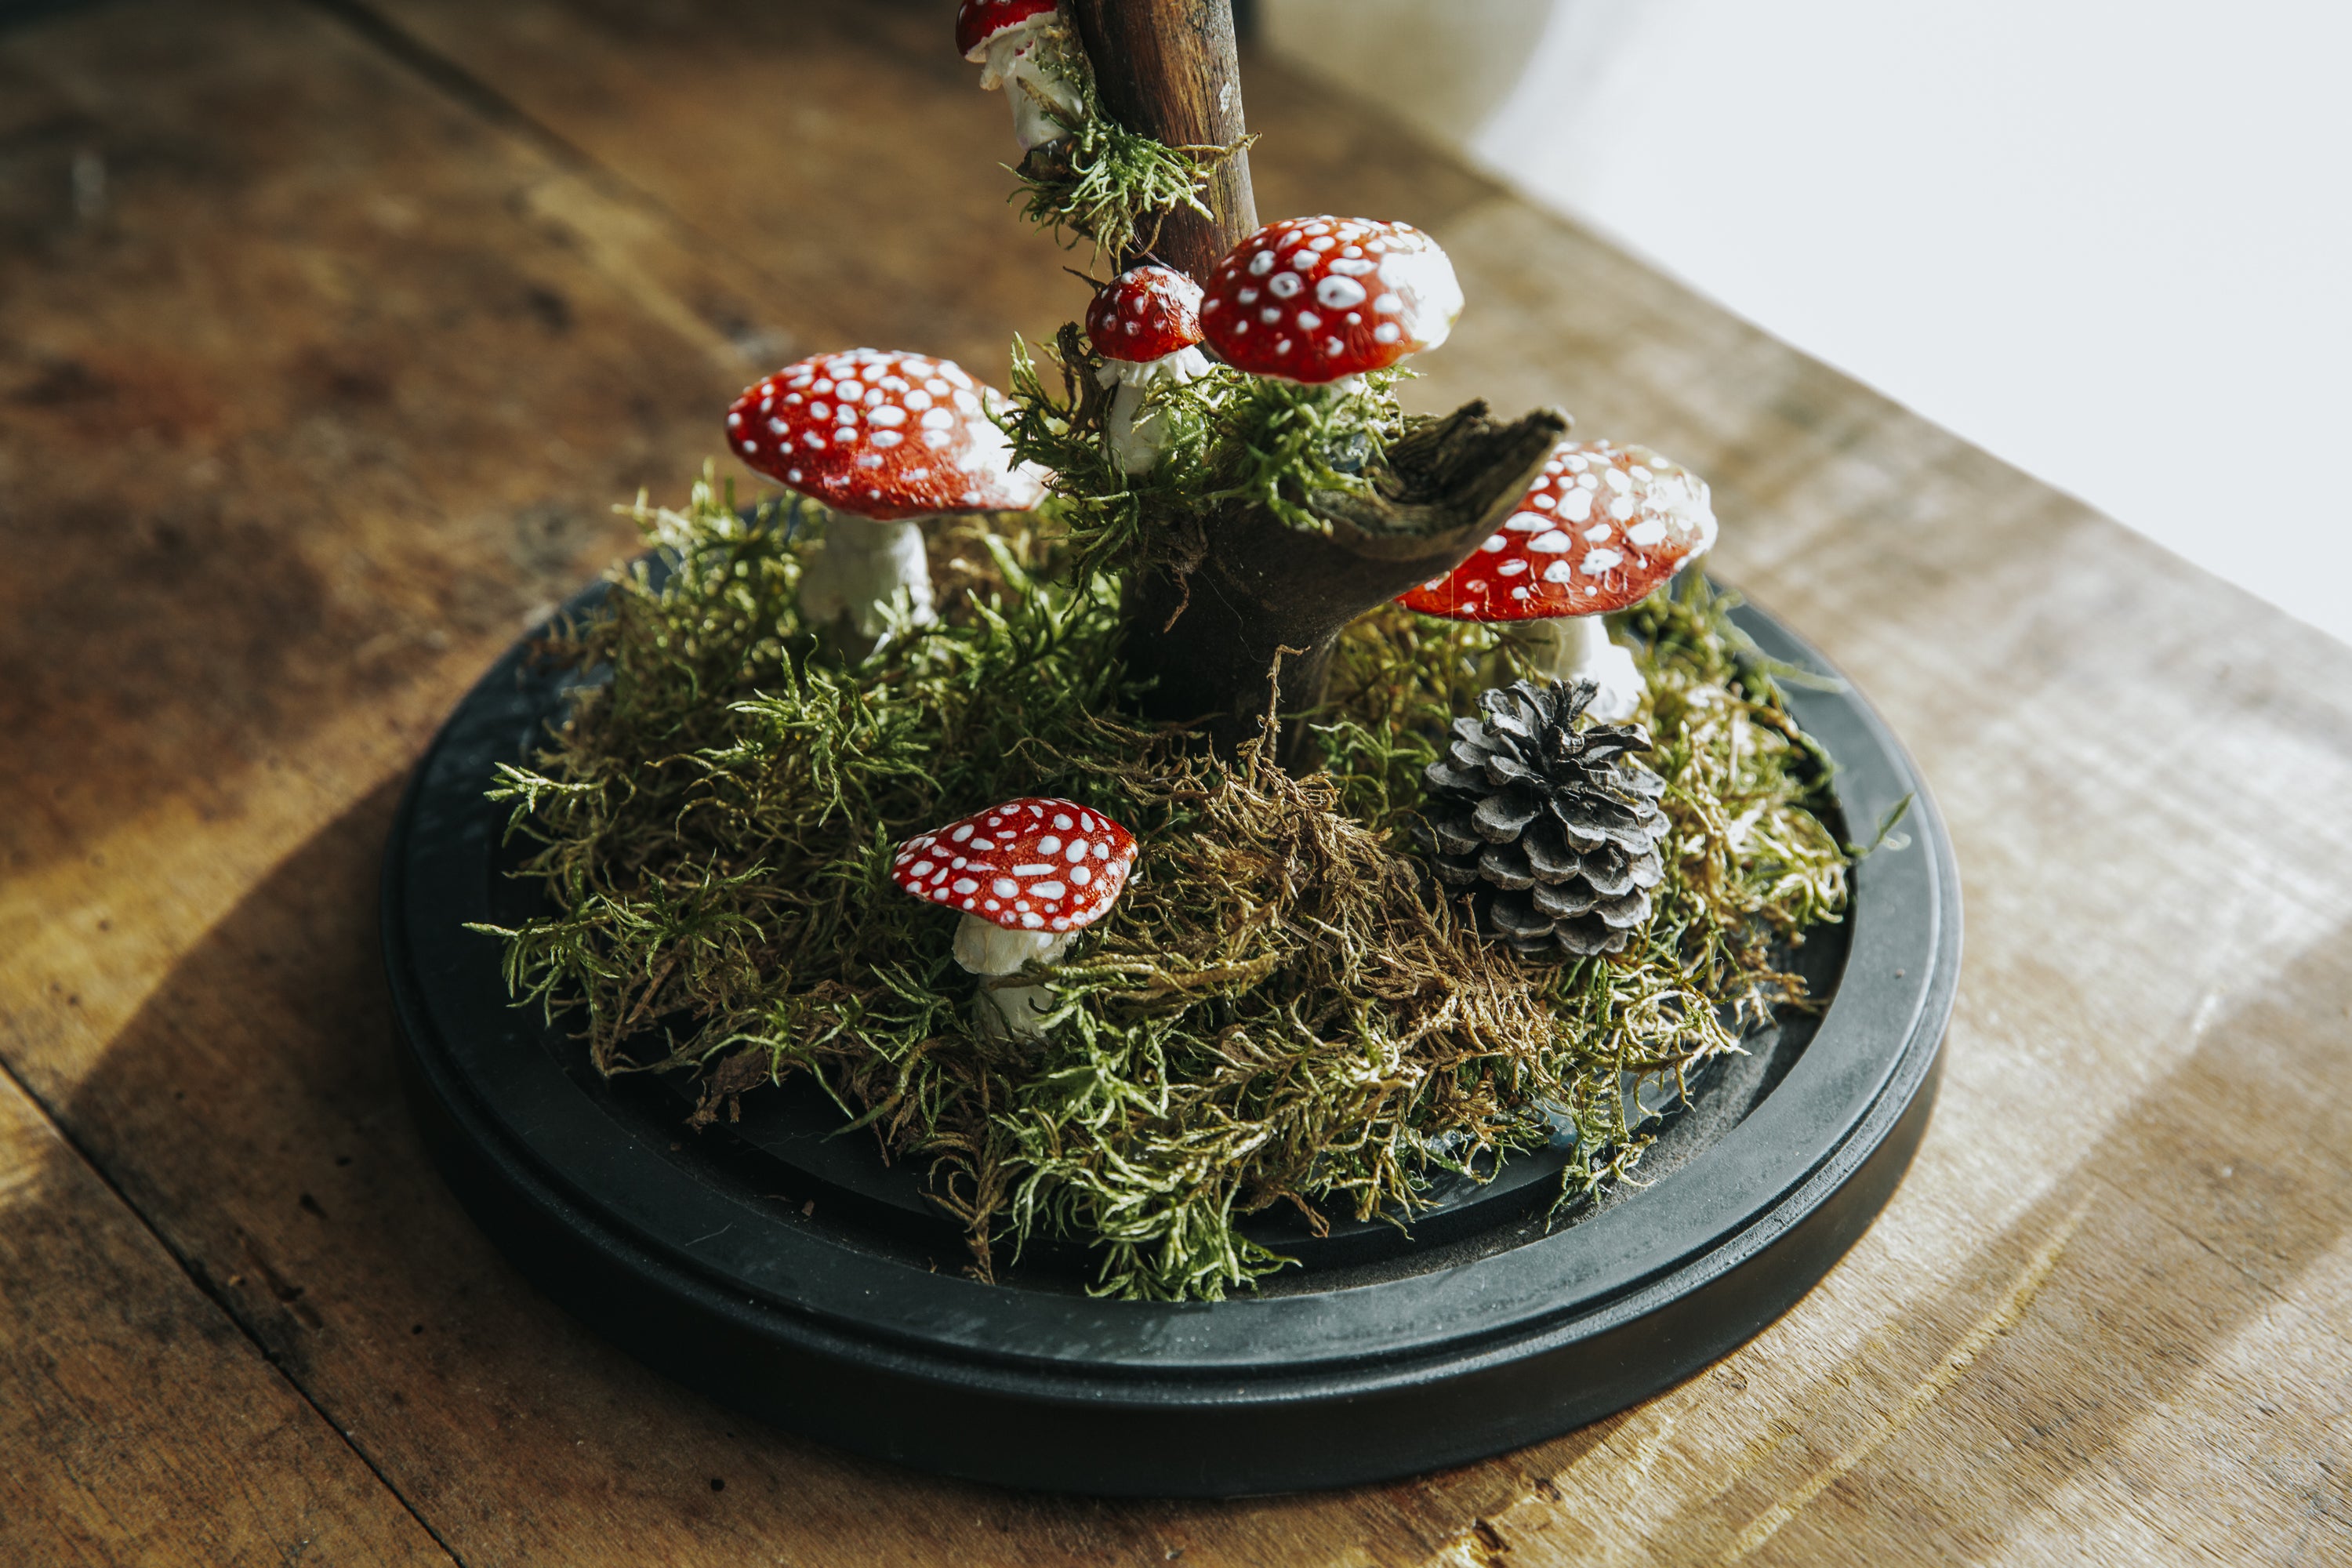
Bake the finished mushrooms in the oven at 110 degrees for 30 minutes. Then you let them cool and you can paint them with acrylic paint. I used a total of four coats here.
1st layer: Orange, red and dark brown mixed to create different shades, creating a transition from dark to lighter from the center to the edge.
2nd layer: A lighter brown partially on the slats and cuff areas.
3rd layer: A cream tone over the lower part of the mushroom. The previously brown ones still shimmer slightly here.
4th layer: Added the dots on the mushroom with white
You can use the finished polymer clay toadstools for decorations. I placed them on a root, along with moss, under a glass dome.

Do you want more nature? Then take a look at our natural jewelry or our forest postcard set . We also have a DIY for a marbled jewelry bowl made of polymer clay .
Written by Jacky Eitzert
Leave a comment
This site is protected by hCaptcha and the hCaptcha Privacy Policy and Terms of Service apply.