


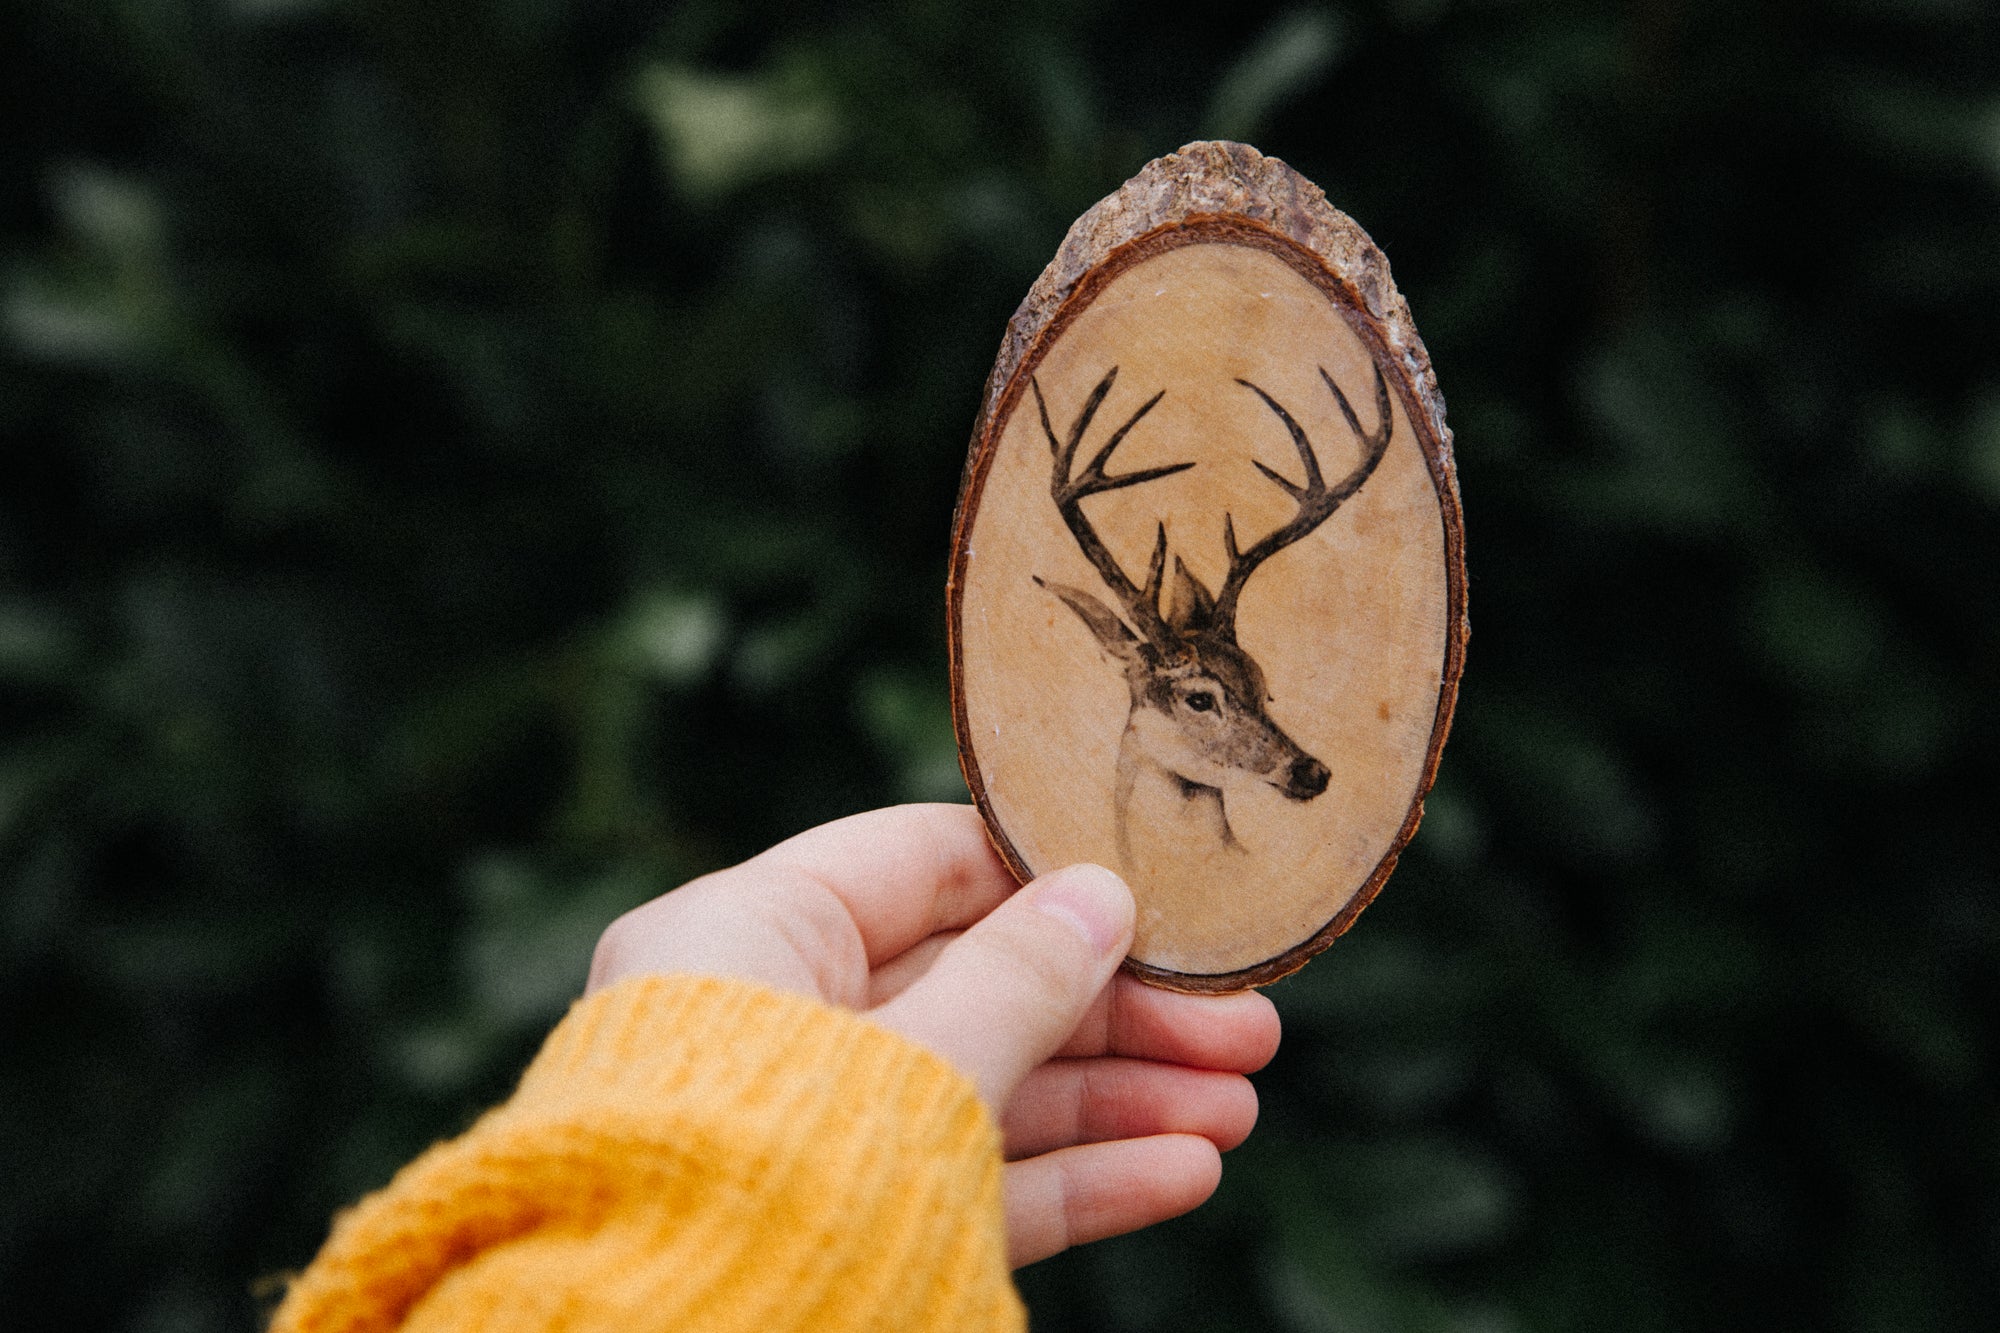
DIY: WOOD TRANSFER OF NATURAL DESIGNS
Today we would like to show you how you can easily transfer printed nature motifs to wood. You can then use the resulting decorative objects as coasters, small gifts or as wall pictures.

Material:
You need:
- Laser printer (also available in the copy shop)
- untreated wood (this can be cut branches or wooden discs)
- photo pot
- nature motifs
- Photo potch finishing varnish
- aluminum foil
- Paint brush
- sponge

1. Find your nature motifs and print them out
First think about which motifs you want to transfer to the wooden discs. You can draw something yourself and scan it, or see what you can find online. Canva, for example, has many free themes. You can simply enter Leaf for elements, for example, and then go to Graphics. We painted the fox motif and you can download it for free at the end of the article. Once you have found your motifs, print them out in different sizes on a laser printer and cut them out. Then you can put them on the wooden discs to try them out.

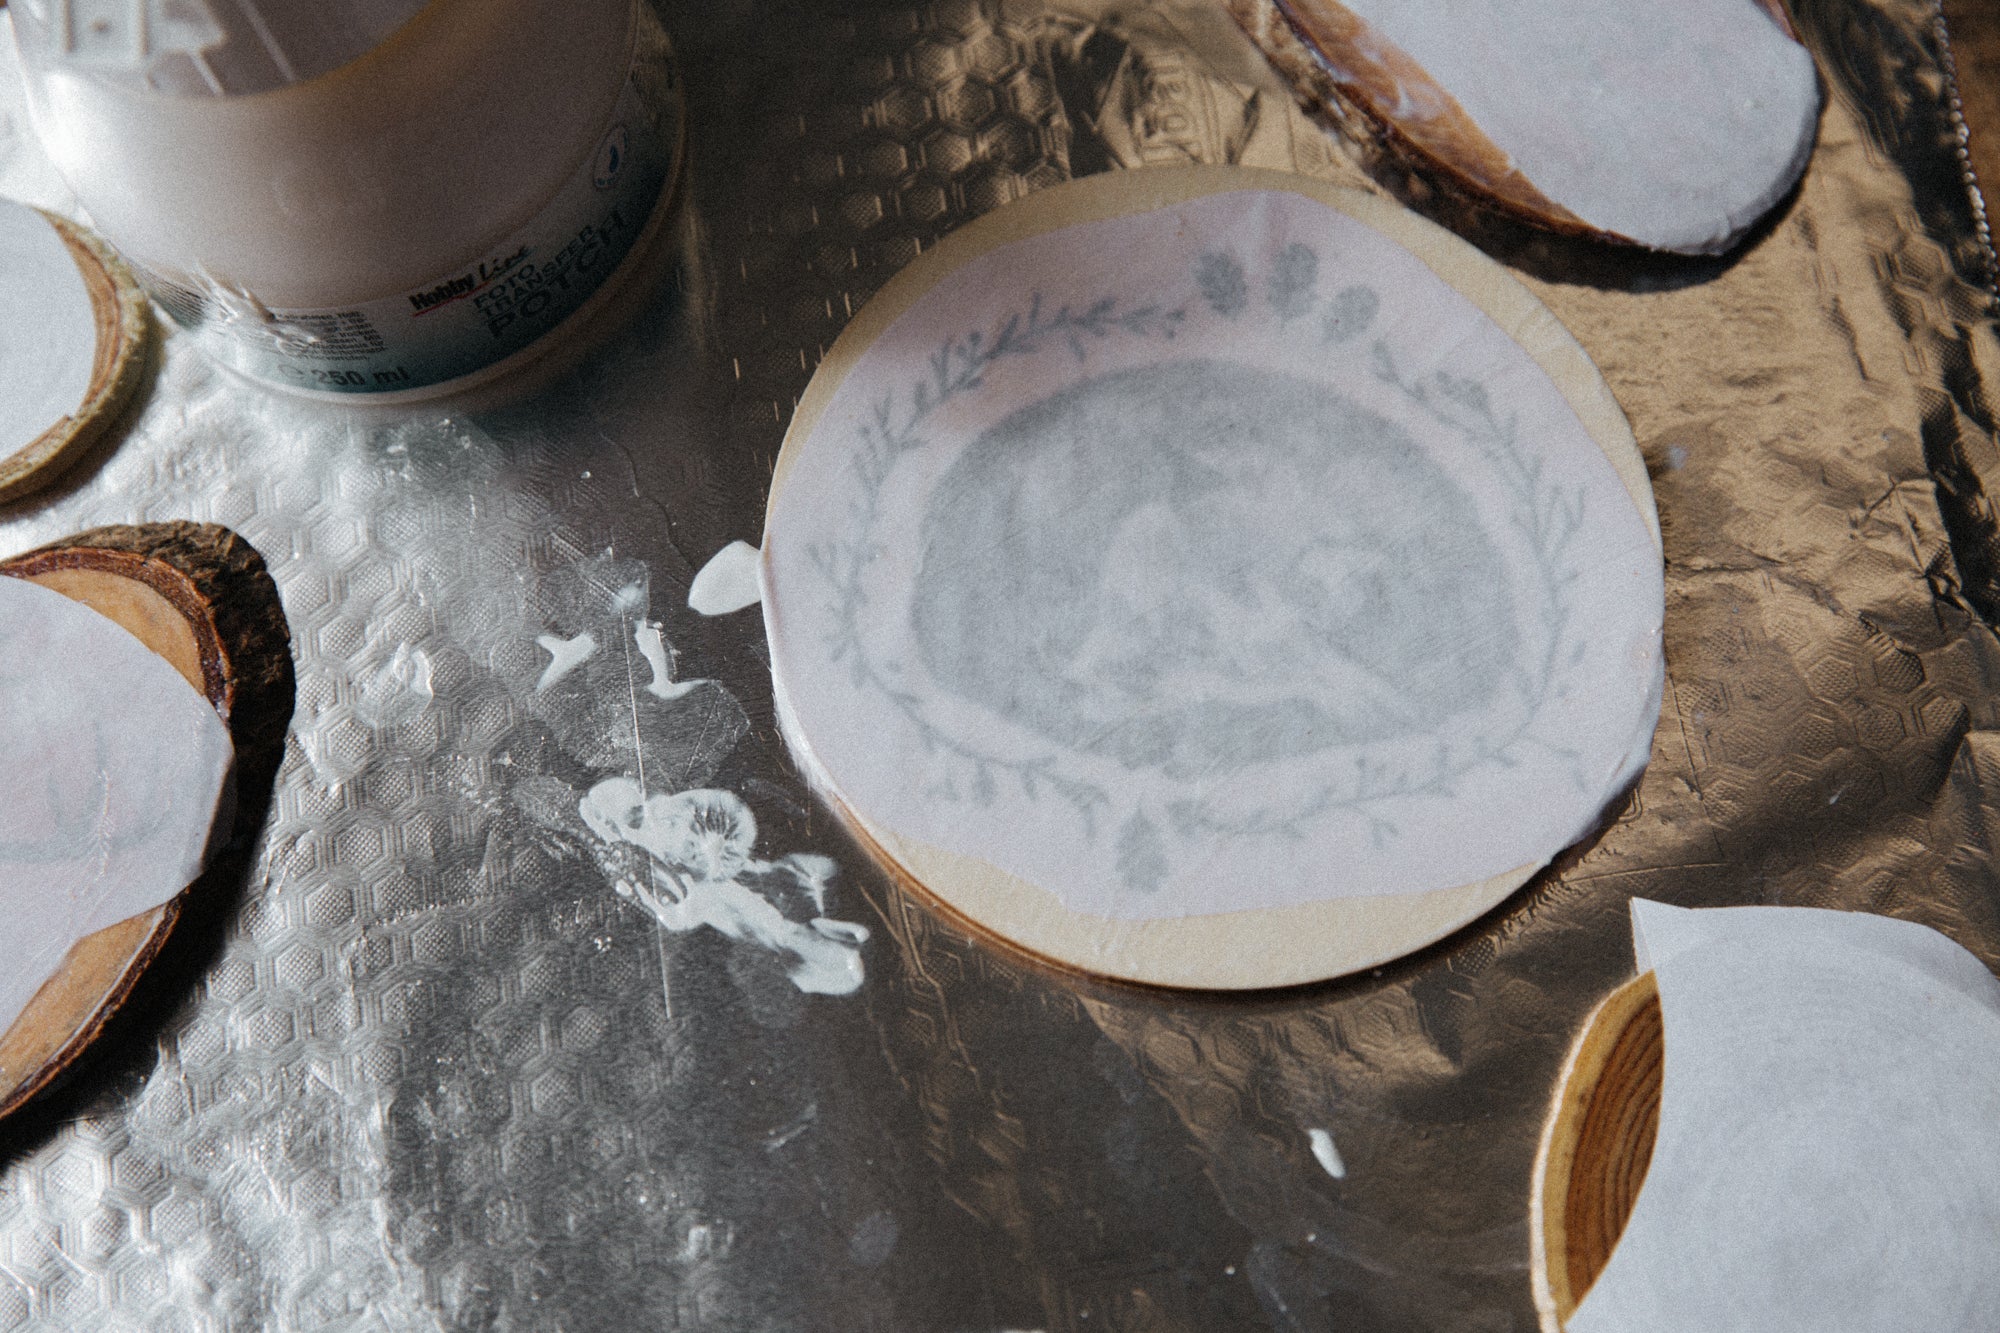
2. Apply the Photo Potch
Now you can apply the Photo Potch to the motif and the wooden disc with a brush. Don't be too frugal. Then use a ruler or your fingers to pull out the excess potch from under the picture so that there are no air bubbles or wrinkles.
3. Blow dry the motifs
Now you can dry the motifs with a hair dryer for 10 minutes

4. Remove paper with the sponge
Now comes the most exciting part of the DIY. Now remove the paper with a damp sponge and plenty of water. Only the print on the wood remains.

5. Drying and varnishing
The wooden discs now have to dry. After a few hours you can then paint them with the Foto Potch top coat.

Do you enjoy DIY's? Then we have even more for you here: Marbled jewelery bowl


Written by Jacky Eitzert
Leave a comment
This site is protected by hCaptcha and the hCaptcha Privacy Policy and Terms of Service apply.